
How to Set Up Push Notification in Android with Firebase Cloud Messaging


Want to know more about the Firebase push notification for Android, cloud messaging, and its best practices? ✔️ Check our article to learn more!
I am going to show you how to use Firebase Cloud Messaging for Push Notifications implementation on Android. First, let’s start with the definition of Firebase cloud messaging on Android, check its types of messages, and then see how to implement push notification on Android!
What Is Firebase Cloud Messaging (FCM notification)?
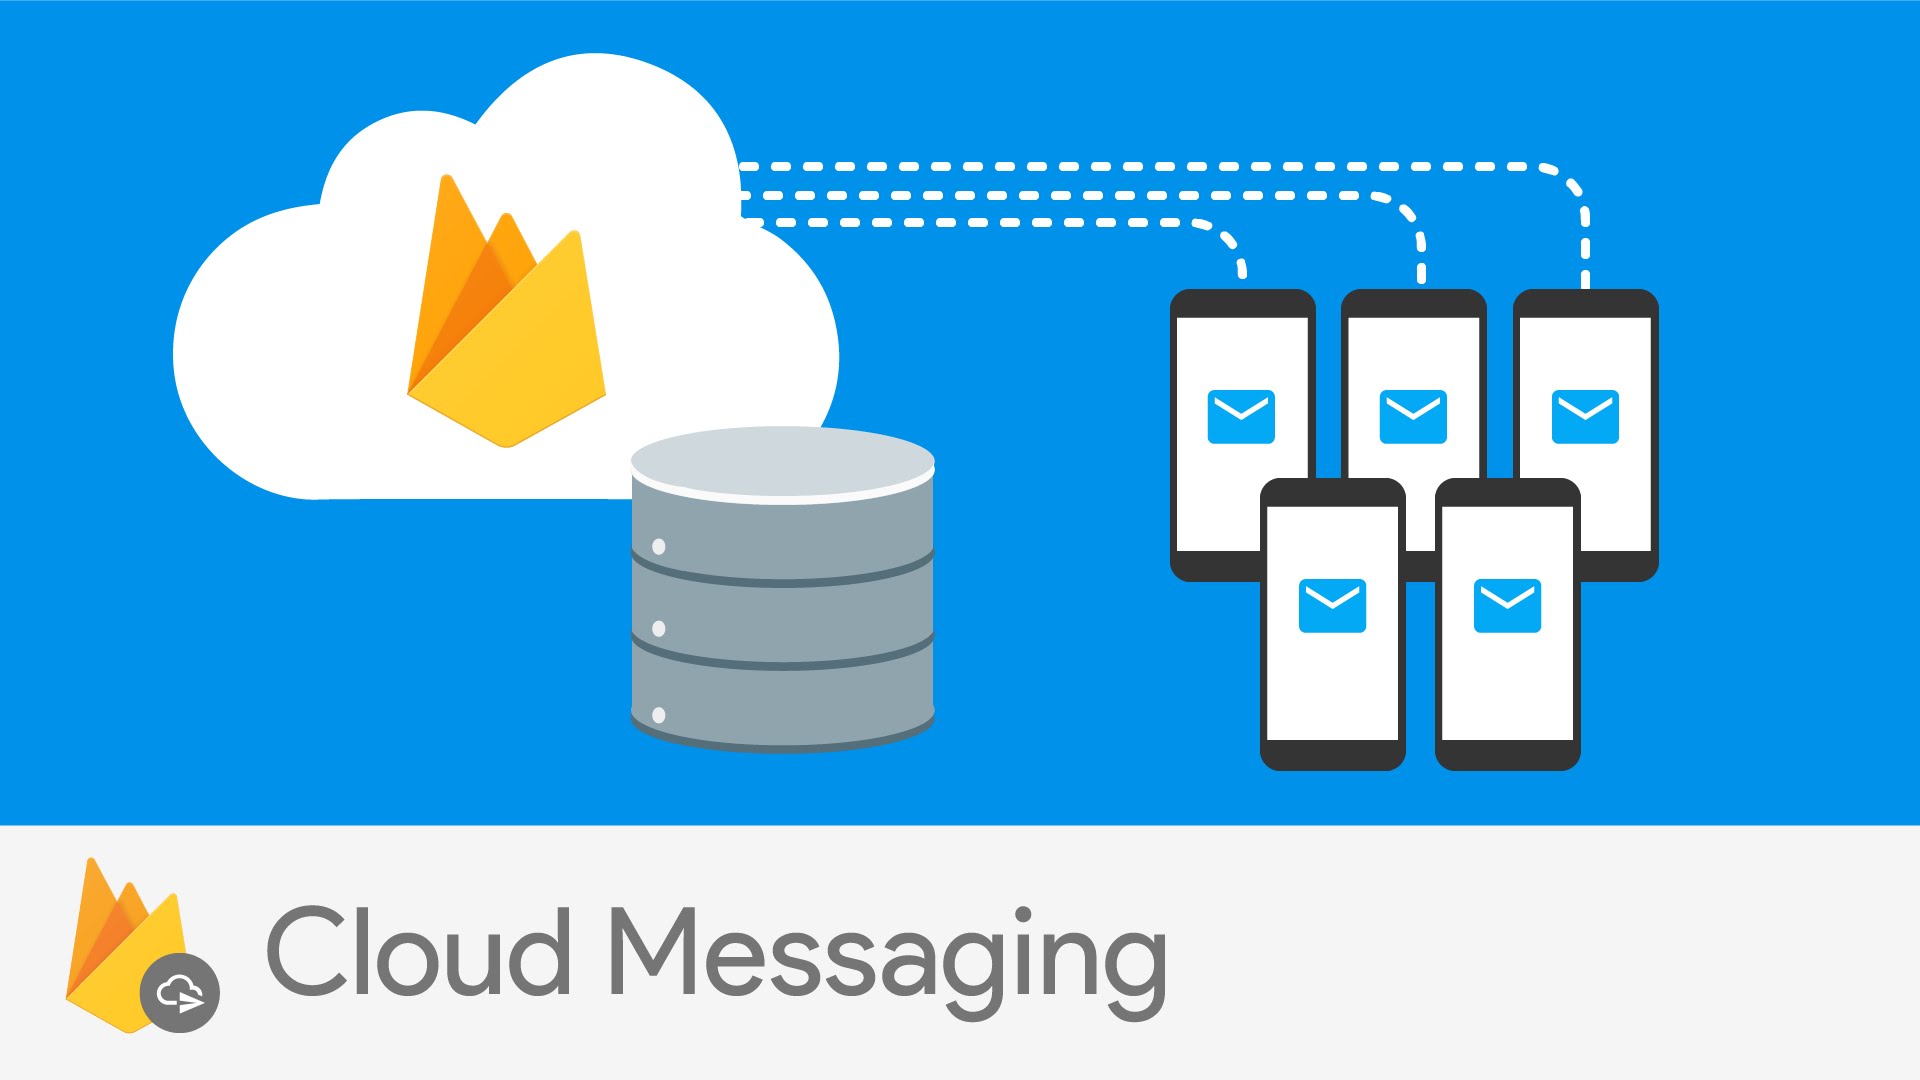
Firebase Cloud Messaging (FCM) is a cross-platform messaging solution that lets you reliably deliver messages at no cost.
According to Firebase Messaging on Android Official Documentation:
- Firebase push notification on Android (FCM) is the new version of GCM under the Firebase brand;
- It inherits GCM’s core infrastructure, with new Firebase push notification SDKs to make Cloud Messaging development easier.
Benefits of upgrading from GCM to Android Firebase push notification SDK include:
- Simpler client development. You no longer have to write your own registration or subscription retry logic;
- An out-of-the-box Android Firebase notification solution. You can use FCM notifications, a serverless notifications solution with a web console that lets anyone send notifications to target specific audiences based on Firebase Push Notification Analytics insights.
Firebase Messaging Types: Short Overview
Each type is used for different purposes and carries different information within itself. Let’s see the options that could be used:
- Notifications — this form is much appreciated by the marketing teams as it helps to deliver arbitrary texts and images to users, increasing the involvement of users. With a certain header and text with the context that contains info about what happened, you can remind users/developers of something important. It gives control over information about an application. Such a type will be managed by the system, and your texts will be processed and shown in the background.
- Data — this form is the Firebase response to a user or developer request that contains a specific date. Basically, a form is used with the additional custom data elements and info.
- Hybrid — usage of this form depends on the state of an app. If it’s in the background, then the app will receive the new information once the user taps it. For the foreground, the information will be accessible when both payloads are ready for use. Clicking behavior differs depending on the form.
How to set up the “Admin-Messaging” on the backend
To start with, open the Setup Firebase Cloud Messaging. Here, you will be able to click on either the Connect to Firebase or Add FMC to your App buttons. Both provide an automatic setup for projects on your console. More information could be found here.
How to configure an Android application and get notifications
Messages/notifications may act differently; this depends on whether the application is in the background or foreground. For foreground (when receiving data elements), you need to use the Firebase Service. This allows you to override the onMessagesReceived and undeleted messages/notifications callbacks. For background apps, you can use the system tray.
How to send the “FCM push-notifications” from the backend
Simply you can try the Send Notification/message API to send Android push notifications. Check out the provided link to get all the necessary instructions for configuration.
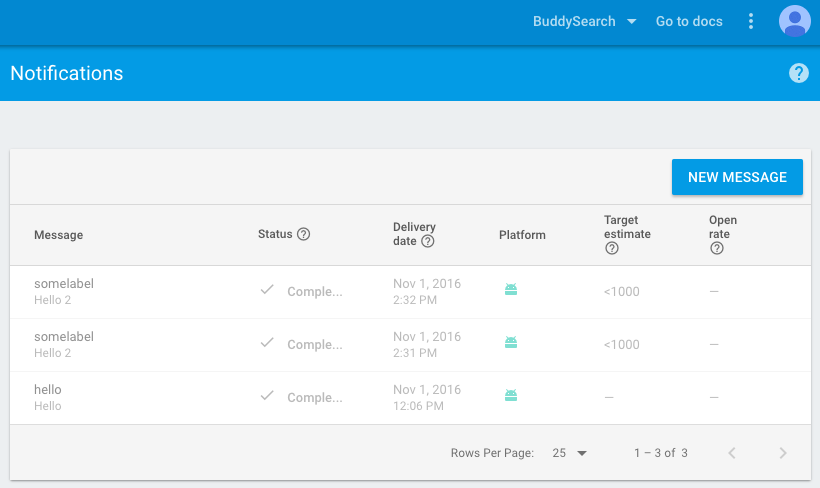
How to send the notification from the Firebase console
Open the Firebase console link. It will lead you to your dashboard, and there, you will be able to see projects. Click on the project and go to Cloud-Messaging. From there, you will find the previous notifications. You can also click on the Create Your First Notification button to compose different texts and add info. Other fields that you should fill include the delivery date.
How to set up Firebase-notifications on the client
To do this, click on Firebase-Messaging API and Android studio. Note that you can do this with clients that have nothing less than Android 4.1. Clients also need to install the Google Play Store app.
To set up a Firebase Cloud Messaging Client App on Android, follow this official instruction.
Once the setup of FCM Push Notifications on Android is finished, you can test if it works well with sending test notifications from Firebase Console. To send notifications from the Notifications console, go to Firebase Console, then open your project, then open the Notifications console and start sending notifications to user segments.
Firebase provides Firebase Notifications and Firebase Cloud Messaging services. For both of them, your Android application needs to be configured the same way. So what is the difference between these two features? To get an answer to this question, please refer to the official documentation: https://firebase.google.com/support/faq/#notifications-difference.
So, from the above comparison, we can see that we can use Firebase Notifications only with the Notifications UI tool embedded into the Firebase console. But we want to send user2user notifications, right? Let's see deeper into Firebase Cloud Messaging.
What Kinds of Cloud Messaging Does Firebase Have & What is the Difference Between Them?
Firebase Cloud messaging allows you to subscribe to receive messages and provides a great flexible API called “Firebase Cloud Messaging HTTP Protocol” to generate and send messages. Please refer to the official documentation to read about this API: https://firebase.google.com/docs/cloud-messaging/http-server-ref.
To send FCM notification, you need to use the above API with HTTP or XMPP protocols. We will use the HTTP protocol in the examples below. There are two variants of FCM implementation:
- With FCM App Server
- Without FCM App Server
Let’s take a look on both of them and try to understand what variant is better and why. Before that, I will explain some definitions that I will use later.
- FCM connection servers — provided by Google. These servers take messages from an app server and send them to a client app running on a device. Google provides connection servers for HTTP and XMPP [From official documentation].
- FCM app server — a server that you must implement in your environment. This app server sends data to a client app via the chosen FCM connection server, using the appropriate XMPP or HTTP protocol [From official documentation].
- User A, B — mobile clients that are authenticated with Firebase Auth.
- Firebase Database — cloud storage provided by Firebase for use by authenticated users.
To post FCM messages through Firebase Connection Server with, for example, HTTP protocol, you need to pass Authorization Header with every POST request. Authorization header is your FCM API Key that you can retrieve from Firebase Console. What does it mean? It means that it’s possible to send the FCM messages from a mobile device that would be sent from a dedicated FCM App Server. However, this has the following problems.
- You're putting your API key in your app, so somebody could decompile your APK to get it.
- Your users would need some way to share their GCM registration IDs with each other. If two users had both their IDs expire at the same time, there would be no way to share them again.
- Someone can use a Man-In-The-Middle attack to catch your FCM API key while sending.
That’s why I STRONGLY recommend you use your own FCM App server, which will be responsible for interaction with FCM Connection Server. Building your app and hosting it on AppEngine or other alternative cloud servers would take about an hour to write and cost less than $10 a month, even for a ton of users.
How to customize status-bar notification for FCM-messaging
It is possible to add different features to FCM push-notification for Android users. If you want to add a click functionality, you can use notification-Intent. It is advisable to handle users while the application is still running. In this case, use the StartActivity to check if there is any activity. Make sure you decide beforehand what your Intent should do in order not to disturb the app’s navigation system.
Two Methods of How to Organize User2user Notification Sending Through FCM
In this article, I will show you how to implement FCM user2user messages for both variants.
Example of FCM Implementation with Own FCM App Server
The variant with the FCM App server. Let’s see how it works.

User B logs into the application and subscribes to a specific, specially dedicated to this user topic: "user_USER_ID.” User A writes a new NotificationRequest record into "notification_requests" child of Firebase Database, which contains "message,” "user_id" — id of User B, and other optional additional info. At the same time, we have Firebase App Server, which tracks/monitors new records’ appearance in "notification_requests" child. If a new record appears, the FCM app server will build and send a new POST HTTP request to FCM Connection Server using the FCM API key as "Authorization" header, and remove the record from the database child after successful sending. After it, FCM Connection Server will send a Push Notification to User B, and voilà… user B will see a new Push Notification in Status Bar.
Below I will show you an example of the described above Firebase App Server. I took the code from this article:
https://firebase.googleblog.com/2016/08/sending-notifications-between-android.html and modified it a bit. It is a JS code that should be run on the Node.js server.
var firebase = require('firebase');
var request = require('request');

var API_KEY = "FCM_API_KEY";

firebase.initializeApp({
  serviceAccount: "account.json",
  databaseURL: "FIREBASE_DATABASE_URL"
});
ref = firebase.database().ref();

function listenForNotificationRequests() {
  var requests = ref.child('notificationRequests');
  requests.on('child_added', function(requestSnapshot) {
    var request = requestSnapshot.val();
    sendNotificationToUser(
      request.user_id,
      request.message,
      function() {
        requestSnapshot.ref.remove();
      }
    );
  }, function(error) {
    console.error(error);
  });
};

function sendNotificationToUser(userId, message, onSuccess) {
  request({
    url: 'https://fcm.googleapis.com/fcm/send',
    method: 'POST',
    headers: {
      'Content-Type': ' application/json',
      'Authorization': 'key=' + API_KEY
    },
    body: JSON.stringify({
      notification: {
        title: message
      },
      to: '/topics/user_' + userId
    })
  }, function(error, response, body) {
    if (response.statusCode >= 400) {
      console.error('HTTP Error: ' + response.statusCode + ' - ' + response.statusMessage);
    } else {
      onSuccess();
    }
  });
}

// start listening
listenForNotificationRequests();
There is no auto-retry in the above simple script, so it will only retry failed notifications when you restart the script. For a more scalable approach, consider using our firebase-queue library.
To make the script above work, install Firebase and request NPM modules. Also, replace the API_KEY variable with your FCM API Key that can be found in Firebase Console. Also, provide your database URL instead of example text. And the last thing you need - to provide an account.json file in the same directory where you place your server code file. Follow the instruction on official documentation that helps you get the needed serviceAccount file, so Firebase sends push-notification.
https://firebase.google.com/docs/admin/setup
After you successfully configured the server code, just run it on your Node.js server.
Then, implement writing new NotificationRequest to Firebase Database child "notification_requests" on mobile client A. This part is out of scope. Refer to Firebase samples if you don’t know how to configure your Database and how to write to it.
https://firebase.google.com/docs/samples/
For now, you would have configured and implemented Firebase App Server, that monitors "notification_requests" child in Firebase Database, and Android Client, that can send a message (write it to "notification_requests" child in Firebase Database) and receive Android FCM push notification. And that’s all. Everything should work now.
Example of FCM Implementation without FCM App Server (Using Only Android Clients)
The variant without FCM App Server
Warning! I have already mentioned that this way is not good because of its security. You will do it at your own risk. Remember that it is better to use Firebase App Server that will be responsible for interaction with FCM Connection Server.
How does the variant without the FCM app server work?

The idea is to use FCM Connection Server API directly from the client, using HTTP POST requests with Authorization Header, that is your FCM API Key.
User B should be subscribed to "user_USER_B_ID".
You should subscribe to the channel in two places:
- Application on Create;
- After successful Sign In.
FirebaseAuth auth;
String currentUser = auth.getCurrentUser() ;
if (currentUser !=  null) {
FirebaseMessaging.getInstance().subscribeToTopic("user_" + currentUser);
}
Also, you should unsubscribe from the topic in two places:
- Application onTerminate,
- After successful Sign Out.
FirebaseAuth auth;
String currentUser = auth.getCurrentUser() ;
if (currentUser !=  null) {
FirebaseMessaging.getInstance().unsubscribeFromTopic("user_" + currentUser);
}
Also, your application should be properly configured to receive FCM notifications. I posted a link on how to do it at the beginning of this article.
Now let's write the method that will send your notification to User A device:
  private void sendNotification(String text, String senderId, String receiverId) {
        //send Push Notification
        HttpsURLConnection connection = null;
        try {

            URL url = new URL("https://fcm.googleapis.com/fcm/send");
            connection = (HttpsURLConnection) url.openConnection();
            connection.setDoOutput(true);
            connection.setDoInput(true);
            connection.setRequestMethod("POST");
            connection.setRequestProperty("Content-Type", "application/json");
            //Put below you FCM API Key instead
            connection.setRequestProperty("Authorization", "key="
                    + “YOUR_FCM_API_KEY”);

            JSONObject root = new JSONObject();
            JSONObject data = new JSONObject();
            data.put(KEY_FCM_TEXT, text);
            data.put(KEY_FCM_SENDER_ID, sender);
            root.put("data", data);
            root.put("to", "/topics/user_" + receiverId);

            byte[] outputBytes = root.toString().getBytes("UTF-8");
            OutputStream os = connection.getOutputStream();
            os.write(outputBytes);
            os.flush();
            os.close();
            connection.getInputStream(); //do not remove this line. request will not work without it gg

        } catch (MalformedURLException e) {
            e.printStackTrace();
        } catch (IOException e) {
            e.printStackTrace();
        } catch (JSONException e) {
            e.printStackTrace();
        } finally {
            if (connection != null) connection.disconnect();
        }
    }
Use this method in place where you would like to send a notification. Pay attention that we don’t use the “notification” key for building the request, and a bit later, I will explain why. We only use the "data" block with custom keys.
The last step is to override public void onMessageReceived(RemoteMessage remoteMessage) if we want to customize our received by User B Push Notifications.
Next, you should know it is very important. So, the official Firebase documentation says:
For downstream messaging, FCM provides two types of payload: notification and data. For notification type, FCM automatically displays the message to end-user devices on behalf of the client app. Notifications have a predefined set of user-visible keys. For data type, the client app is responsible for processing data messages. Data messages have only custom key-value pairs.
It means, practically, that if you use the "notification" payload in your request, you won’t be able to customize your notification appearing and behavior. For example, status bar notification will only appear if the application is in the background. In all other cases, it will not appear.
But what if we want to show our notification in all cases when the user is not on the appropriate screen? For example, User B is reading the news in your app (the app is in foreground), and at that time, User A sends a message to User B. With default "notification" payload behavior, it’s not possible. User B does not see Push Notification. But, it is possible without a "notification" payload, using only a "data" payload with custom Key-Value pairs. That’s why in the code for notification sending, I used only the "data" payload.
The full code for implementation for custom notifications:
@Override
public void onMessageReceived(RemoteMessage remoteMessage) {
	Map<String, String> data = remoteMessage.getData();
	if (data == null) {
    return;
	}
	String senderId = data.get(FirebaseMessageEntityStore.KEY_FCM_SENDER_ID);
if (TextUtils.isEmpty(senderId)) {
	    return;
	}
String senderName = getUsernameById(senderId);
showNotification(senderId, senderName, message, true);
}


private void showNotifcation(String senderId, String senderFullName, String message, boolean needSound) {
        if (DialogPresenter.getCurrentPeerId() != null) {
            return;
        }
        Intent intent = new Intent(this, DialogActivity.class);
        intent.addFlags(Intent.FLAG_ACTIVITY_CLEAR_TOP);
        intent.putExtra(DialogActivity.KEY_PEER_ID, senderId);
        PendingIntent pendingIntent = PendingIntent.getActivity(this, 0, intent, PendingIntent.FLAG_ONE_SHOT);

        Uri defaultSoundUri = RingtoneManager.getDefaultUri(RingtoneManager.TYPE_NOTIFICATION);
        NotificationCompat.Builder notificationBuilder = new NotificationCompat.Builder(this)
                .setContentTitle(senderFullName == null ? getString(com.buddysearch.android.library.R.string.loading) : senderFullName)
                .setContentText(message)
                .setSmallIcon(com.buddysearch.android.data.R.drawable.ic_notification_message)
                .setAutoCancel(true)
                .setContentIntent(pendingIntent);
        if (needSound) {
            notificationBuilder.setSound(defaultSoundUri);
        }

        NotificationManager notificationManager =
                (NotificationManager) getSystemService(Context.NOTIFICATION_SERVICE);
        notificationManager.notify(senderId.hashCode(), notificationBuilder.build());
    }
Now you can test how to send and receive FCM-based Push Notifications without FCM App Server work. It would be wonderful implementing algorithms and actually seeing things work at the Firebase notification Android.
Example of FCM in Real Messenger-application: You Can Play with the App and Explore Its Code
And finally, at the beginning of the article, I promised you to provide an example of FCM in a real messenger-application. Here it is: https://github.com/ihorvitruk/buddysearch.
To conclude, let us review the common mistakes
Here are some common mistakes that you should pay attention to:
- Delivering too many notifications at once,
- Incorrect timing,
- Sending notification that does not have a call-2-action,
- Lack of proper planning,
- Sending non-personalized texts.
Final Thoughts
Firebase push-notification real-time database is a reliable and cost-effective solution. If you are already using certain services in your project, then you can connect the delivery of notifications through the FCM. It allows you to send the right info that targets a specific audience. You can see the same implementation at other projects when explicit advertising is sent through push notifications. We think it's a bad idea to do that.
If you want to know how to properly embed ads in your app or want to know more about Firebase notifications advantages, how to set it up, and how to send an Android push message, you can contact us or follow the instructions discussed earlier. Compile and run it on your environment and see how FCM works in practice!


 facebook
 twitter


